How to Make a Time-Lapse Drawing on a Budget
Engage an Audience and Showcase Your Process and Skills
You love those little time-lapse drawing videos you see on Instagram, Youtube and other social platforms right? Wouldn’t it be cool to learn how to do them without having to spend much money?Video is king and sharing your process is one of the quickest ways to engage an audience and show them your skills. Why do you think every platform is focused on implementing video capabilities over the years?Good news for you is that you can create your own with just your phone and a small investment in some equipment.First off, this is not a "professional setup". I have no DSLR camera nor a professional lighting setup with a tripod.If you have none of these, then this is for you!I’m going to walk you through the recording setup, uploading, editing and export phase to take all the thinking out of it for you.Note: I use Adobe Premiere Pro CC for my video editor. If you do not have this, you can look into free editors like:
- Windows Movie Maker for PC
- iMovie for Mac
- do a Google search
Let’s get started.
Time-Lapse Drawing Video Setup
For a complete listing of every drawing tool I use and a link to buy visit my resources page.
Tripod Magic
Ready to be amazed…..?This is the most ghetto yet effective setup. I use a flexible phone tripod wrapped around a bargain lamp from Wal-Mart.High-quality equipment right?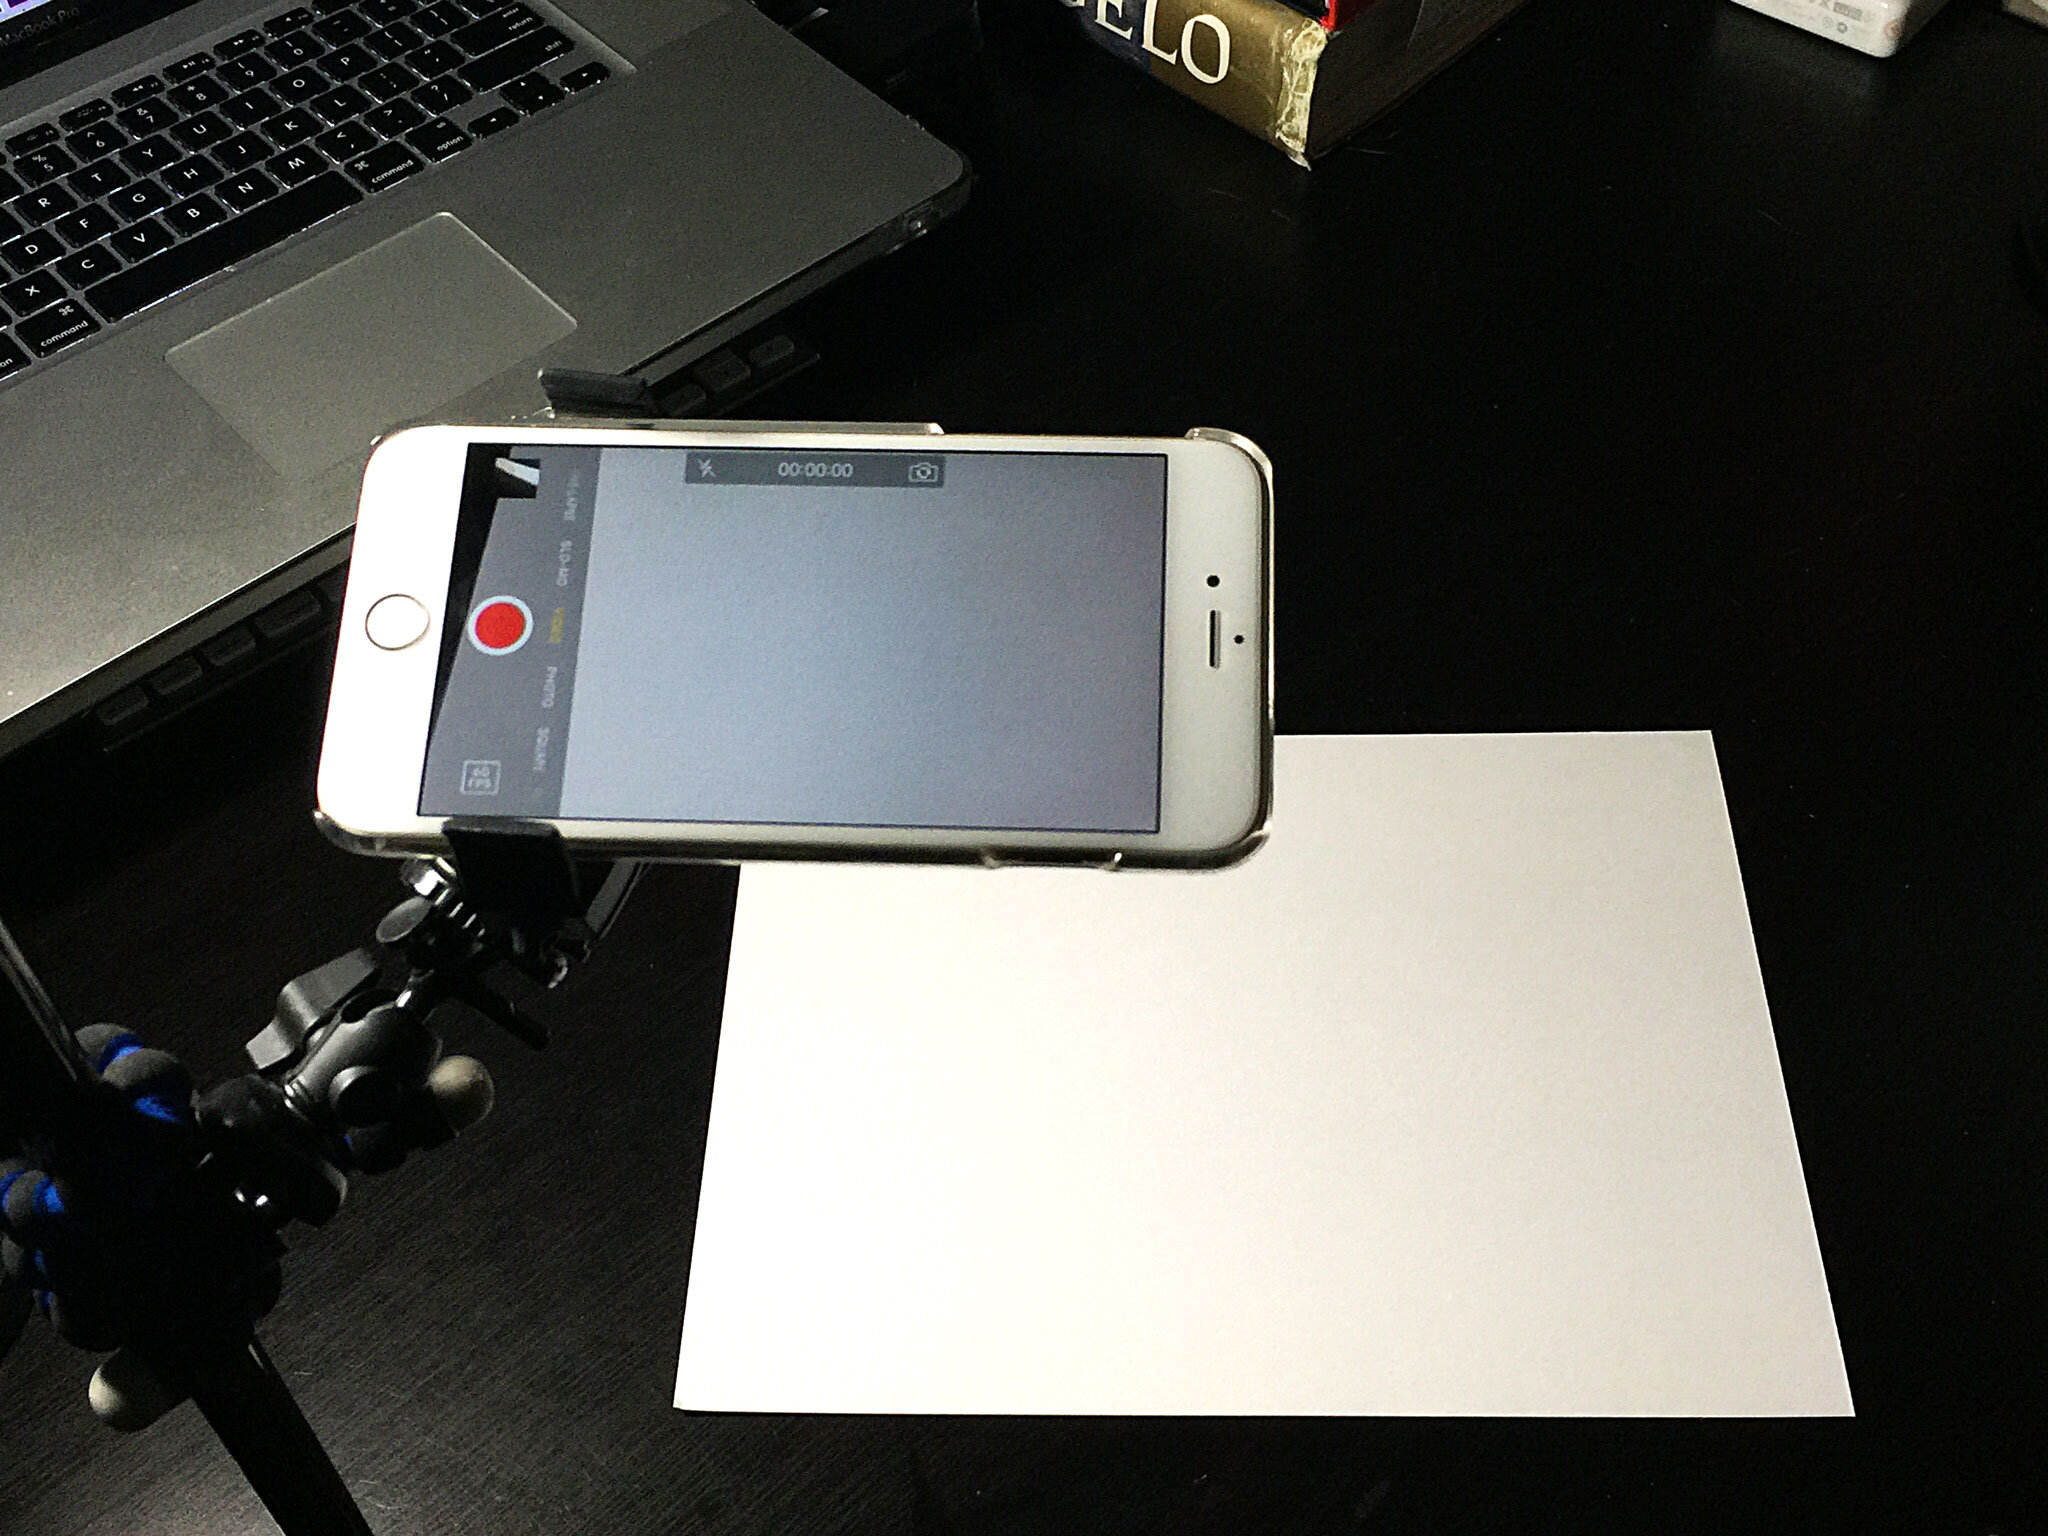 You can wrap this bad boy basically around anything or you can stand it up. This exact one is only $18 and can invest in it here.[button open_new_tab="true" color="accent-color" hover_text_color_override="#fff" size="large" url="https://www.amazon.com/Arkon-Universal-Smartphone-Holder-Flexible/dp/B00I58VB3Y/ref=as_li_ss_tl?s=electronics&ie=UTF8&qid=1453945421&sr=1-1&keywords=arkon+tripod&linkCode=sl1&tag=perspectiveco-20&linkId=e975f486cde76071859e96a356814c02" text="Buy Tripod Here" color_override=""]
Lighting
Again, I have no professional lighting setup. We’re not here to be perfect starting off, but having a solid light source is crucial.Ideally, you’d like to be catching natural light through a window during prime hours of the day. Overcast days are the best. Do some research on what times may work best for you based on your setup.
Recording
First off, make sure you have space on your phone as videos take up a lot of room. I've had several times I've started something and I ran out of space.Once recording, it’s important to keep your drawing in the middle of the frame. I don’t have best practices for keeping it centered except I periodically view how it looks on screen as I’m working on it.The main reason why I keep it centered is because I prefer keeping things in a square 1:1 format on Instagram. Much easier to crop if you shoot and keep it centered in the 1920x1080 frame.
Uploading
Once you’re done, you have to get the file on your computer.Here are several options:
- You can Airdrop the file(s) from your iPhone to your Mac.
- If you have an older mac that doesn’t support this feature, use a USB cable and use the Image Capture app to import video.
- Using a Droid with PC, use whatever clever wireless technology there is or import via USB cable.
- Upload to Dropbox.
Just figure out a way to get it on your computer so we can start making magic.
Magic....I mean Editing
- Start up Premiere Pro application
- New Project
- Project Names
- Pick destination
- Import video files
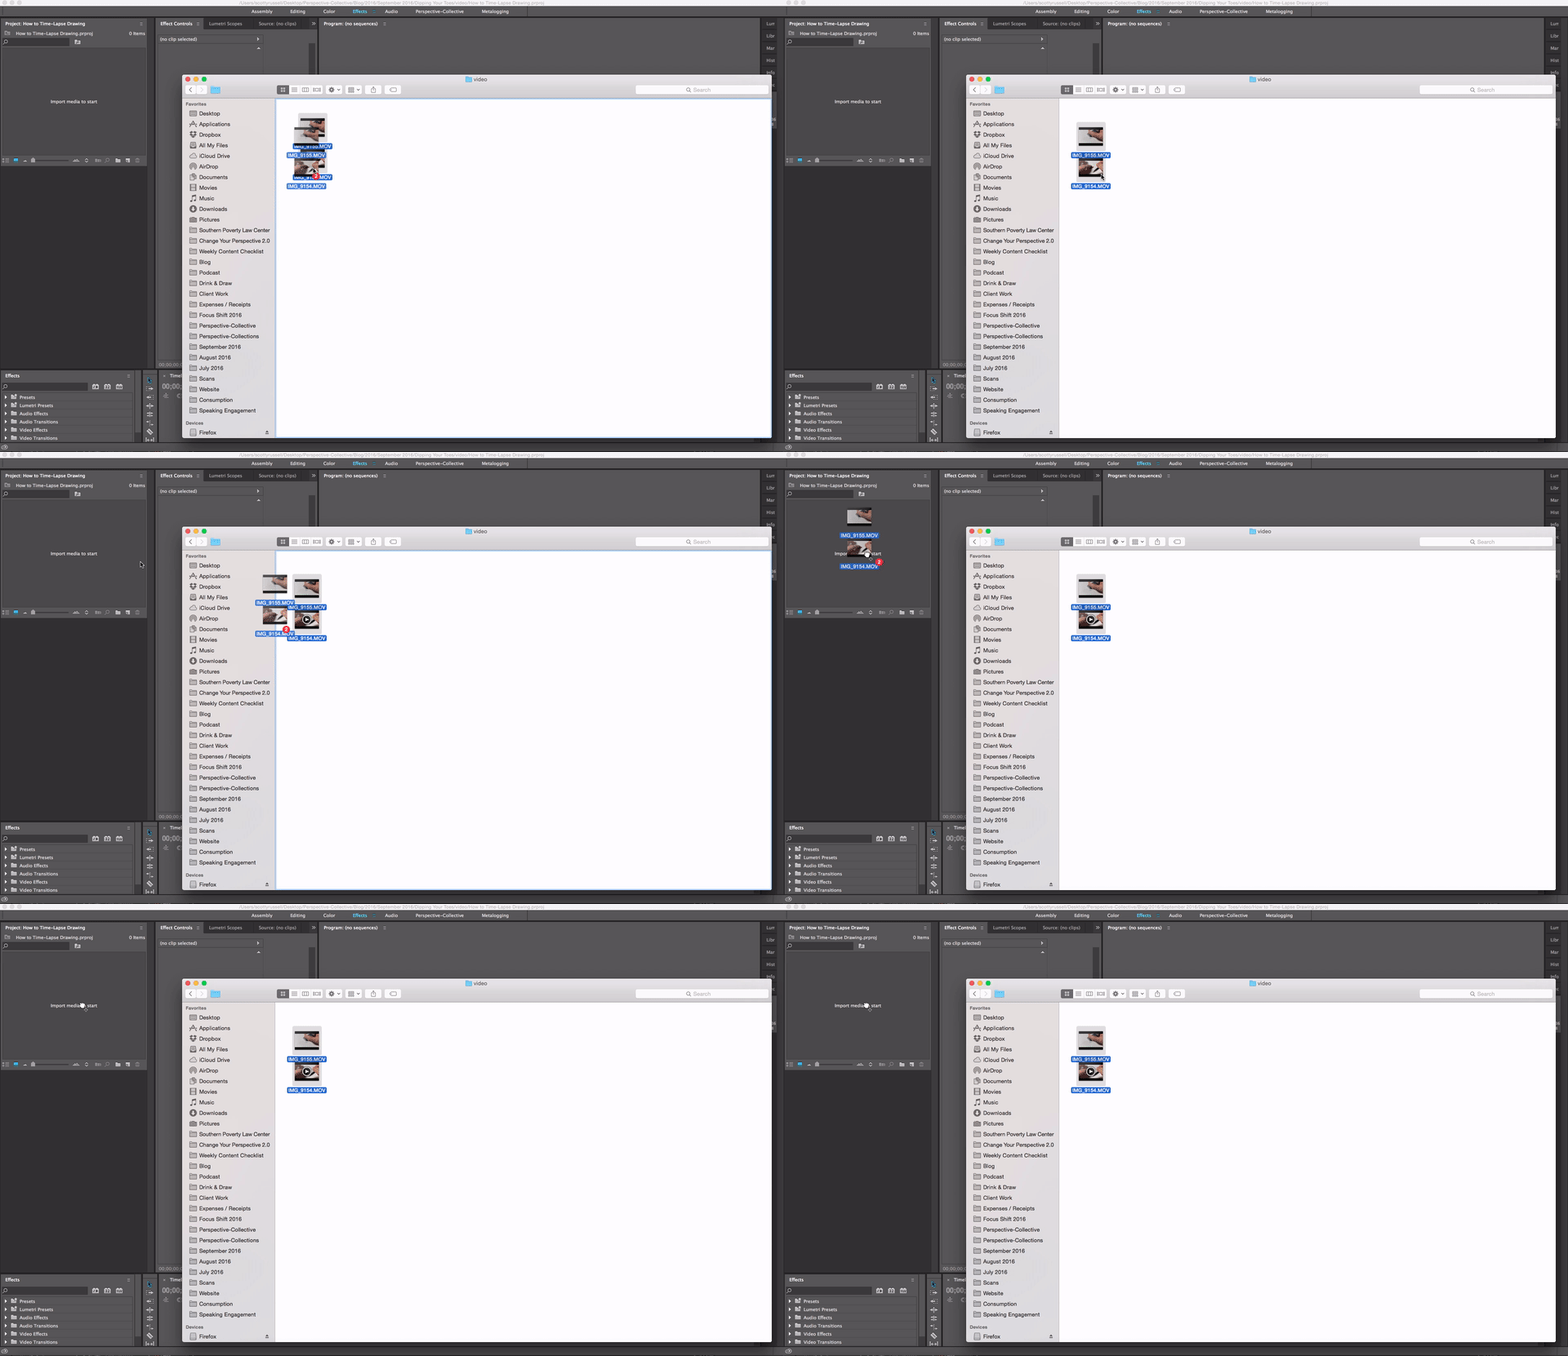
- Create new sequence (cmd+N)
- Select DSLR 1080p30 (keep it large for Youtube and IG capability)
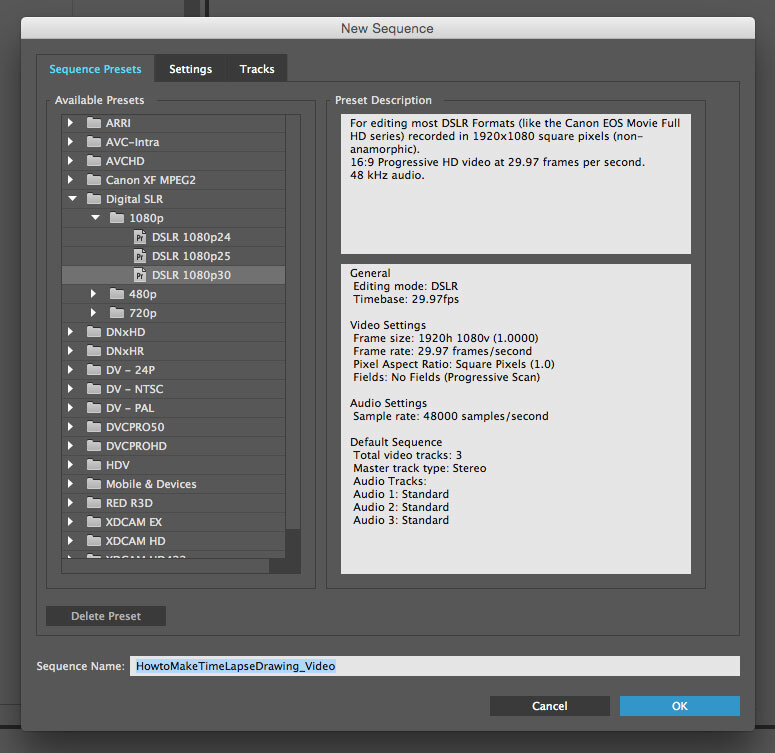
- Select DSLR 1080p30 (keep it large for Youtube and IG capability)
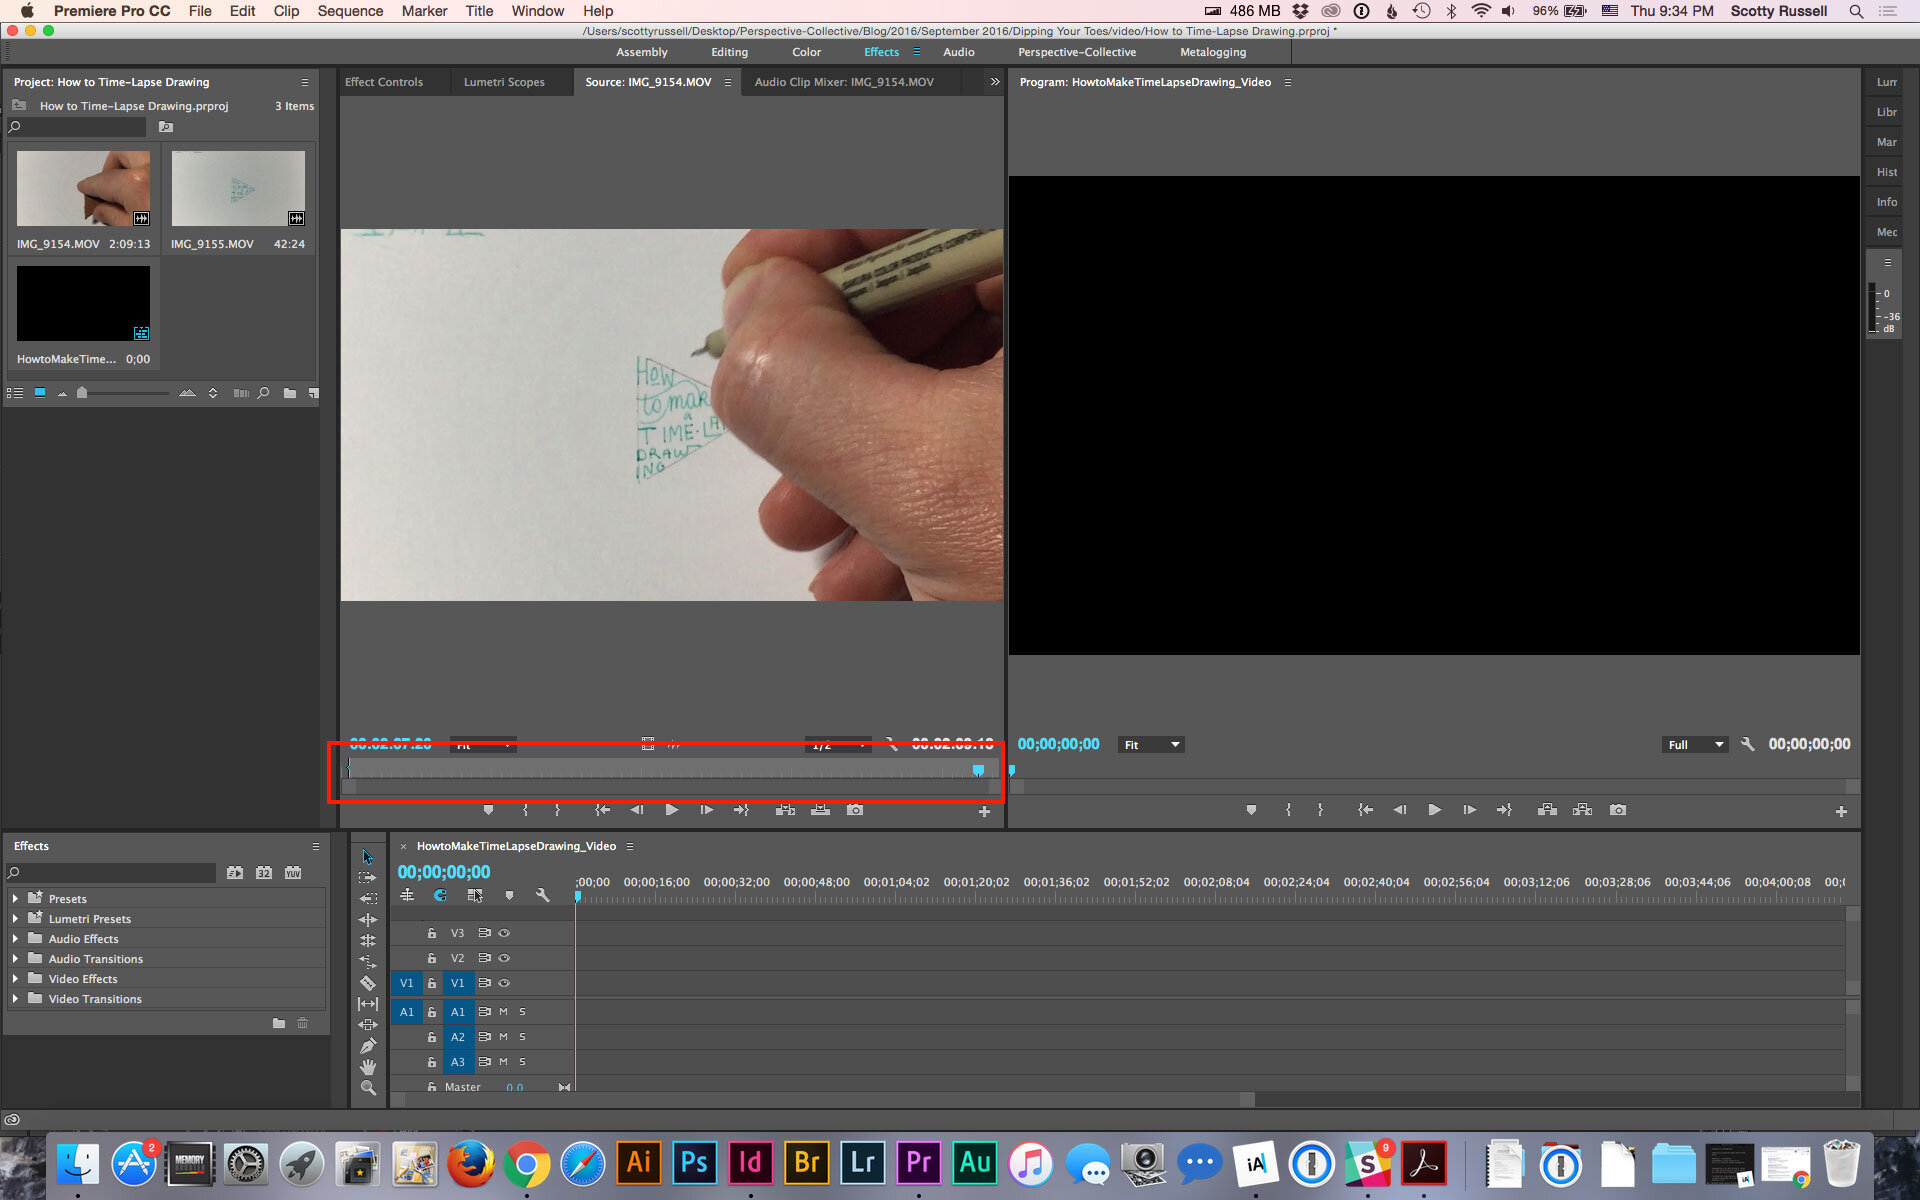
- Double-click movie file in project panel to open in source window
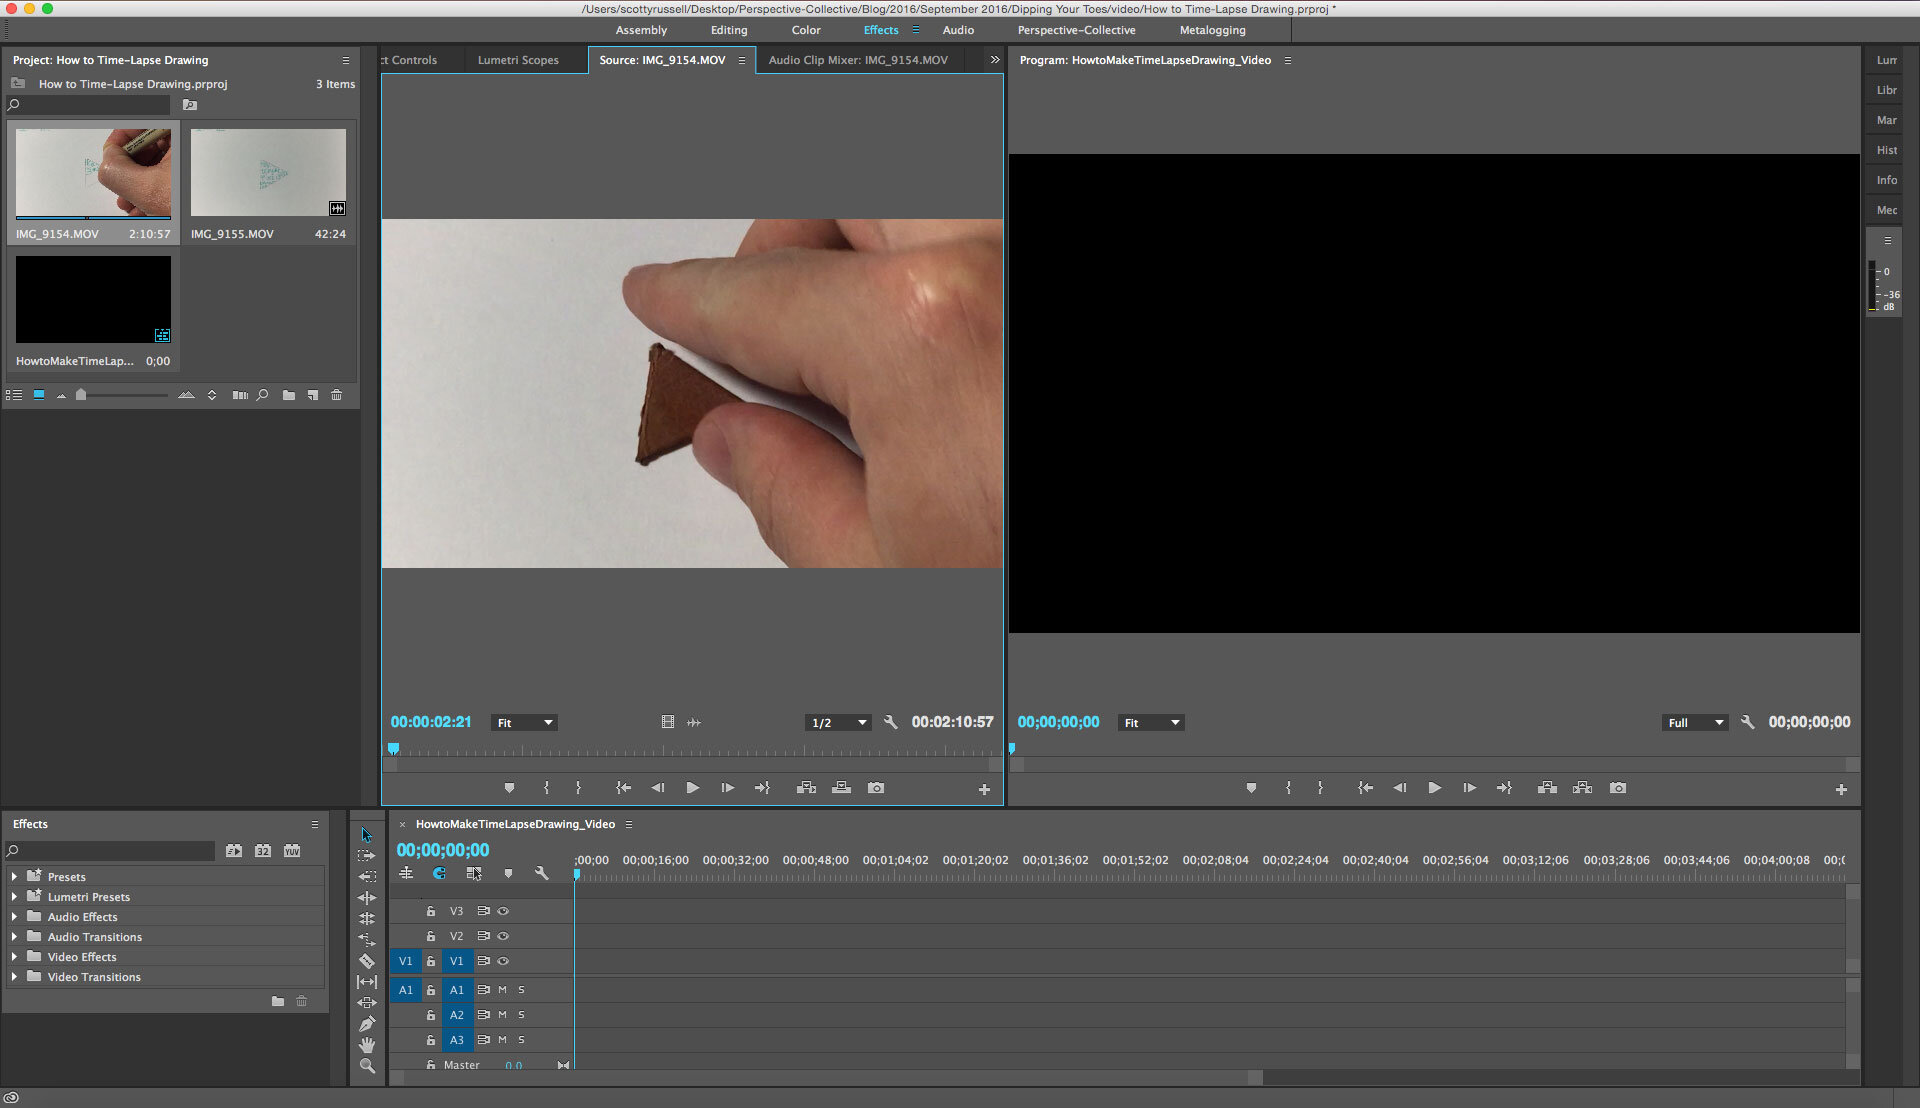
- Use the blue scrubber to move forward or backwards.
- You can use shortcut keys of (J, K, L to rewind, pause / play, fast forward)
- Use the (I) short key to mark the In (beginning) of your clip along with (O) to mark the Out (end) of your clip.
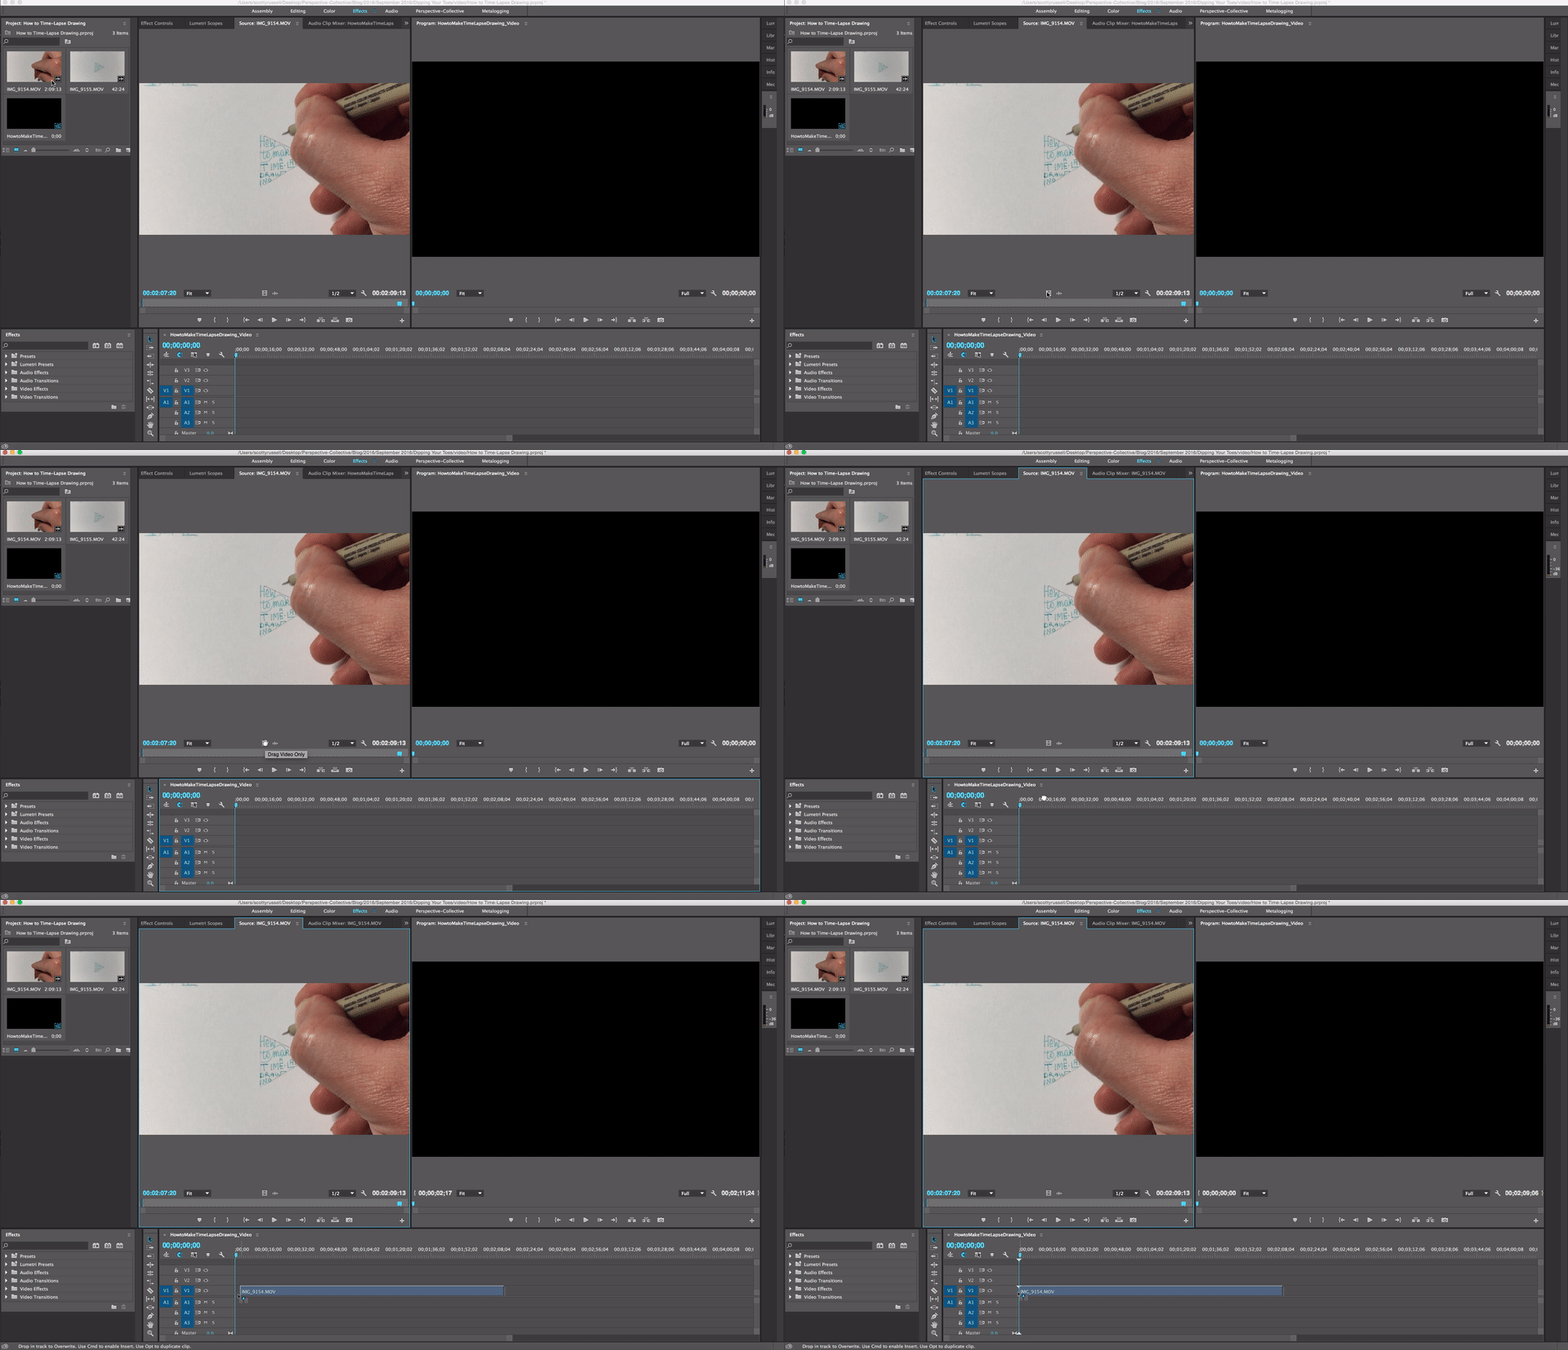
- You can now drag the video file only into your new sequence on the timeline below. (Place it where you see V1)
- Let’s go pick out some fancy music to play in the background because videos without sounds aren’t as much fun.
- I usually drag my music from iTunes
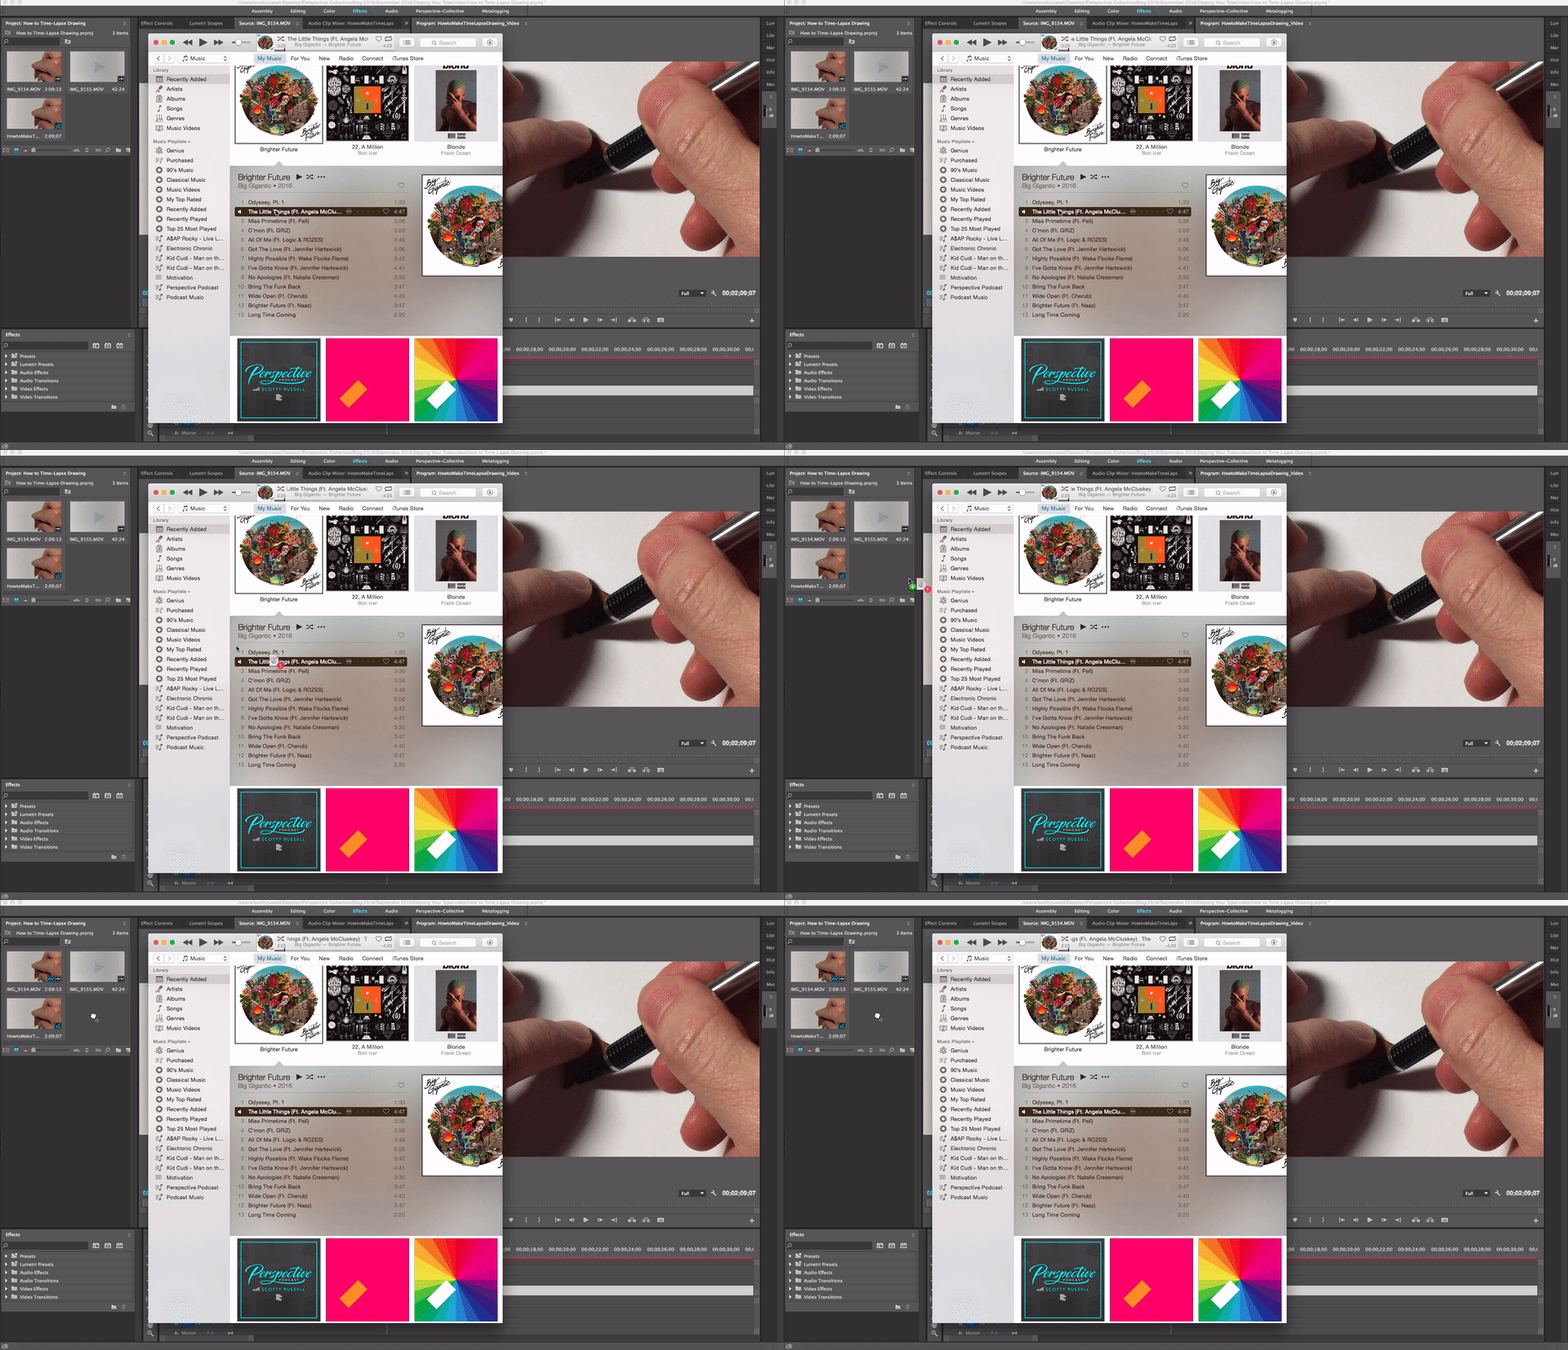
- I usually drag my music from iTunes
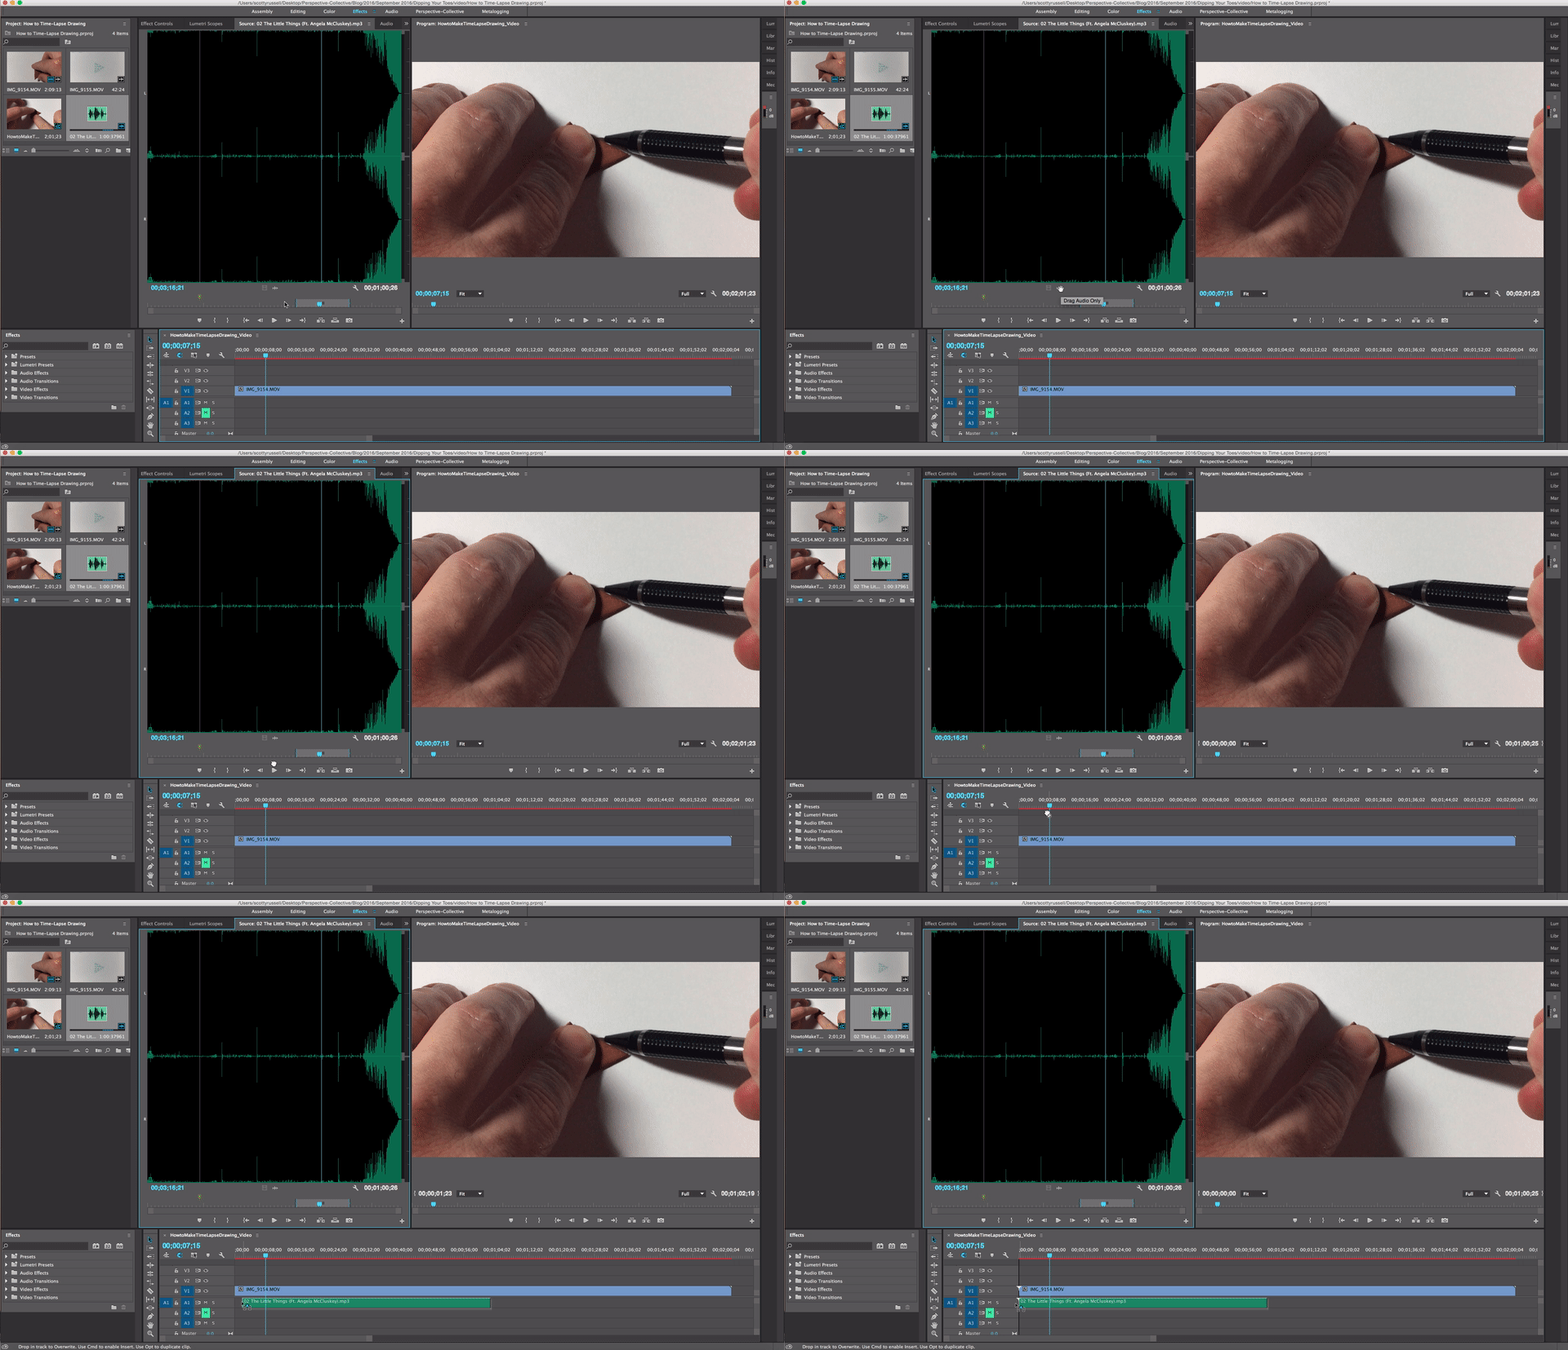
- Double-click the file in the bin to preview in the source panel like we did with the video file.
- Select the In and Out and drag the little audio icon to A1 on your sequence timeline.
- We want to speed this video up now by right clicking it and selecting Speed / Duration
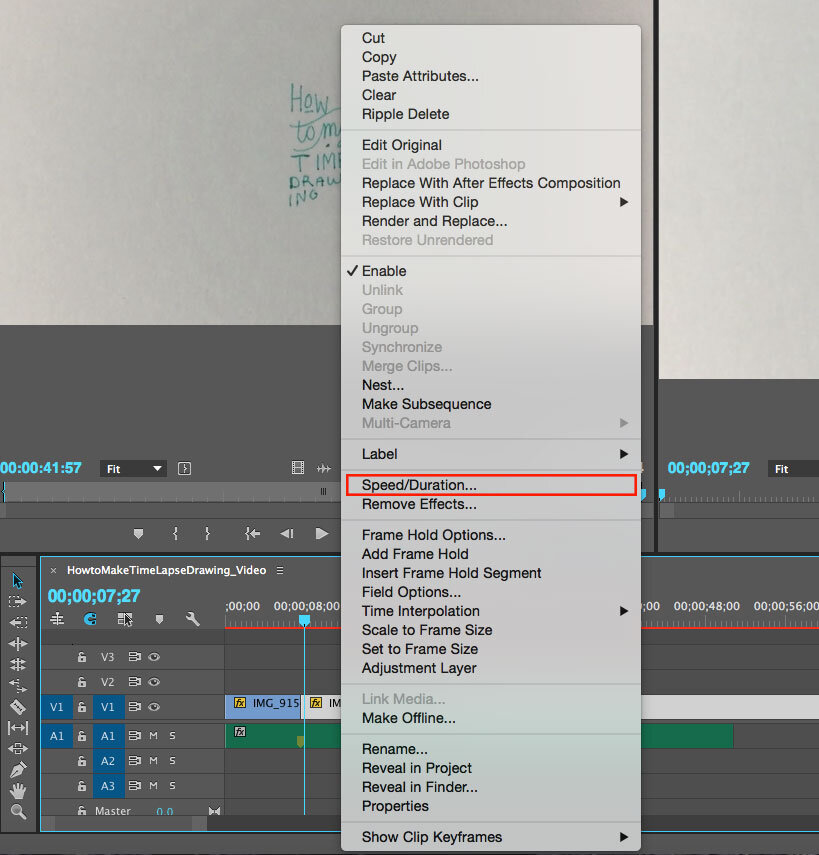
- For this video, I set it to 350
 Note: I had to record and add a second clip because the green ink took forever to dry before I could erase it. You don’t have to worry about multiple clips starting off—just use 1 video with 1 music file.
 - For the second clip, I followed the same steps of 7–8 and matched the Speed / Duration as the first clip of 350
- I then hold shift and drag that clip so it attaches next to the first video clip I placed.
- I like to jazz up my videos with some effects to the audio and video.
- In your effects panel, select Audio Transitions > Crossfade
- Click Constant Gain and drag it to the beginning of your audio clip.
- This makes your music slowly fade in and build up.

- This makes your music slowly fade in and build up.
- Now select Exponential Fade and drag to the end of your audio clip
- This makes your music fade out smoothly
- Now let's make the video clips fade to black by selecting Video Transitions > Dissolve > Dip to Black in the Effects Panel
- Drag this to the end of your video clip

- Before we render this clip out, I like to take the volume down to about –10 dB so it’s not crazy loud on social.
- Select your audio clip now, go back up into the preview panel and select effect controls.
- You’ll see Volume and a little drop down arrow and input –10 into the Level field.
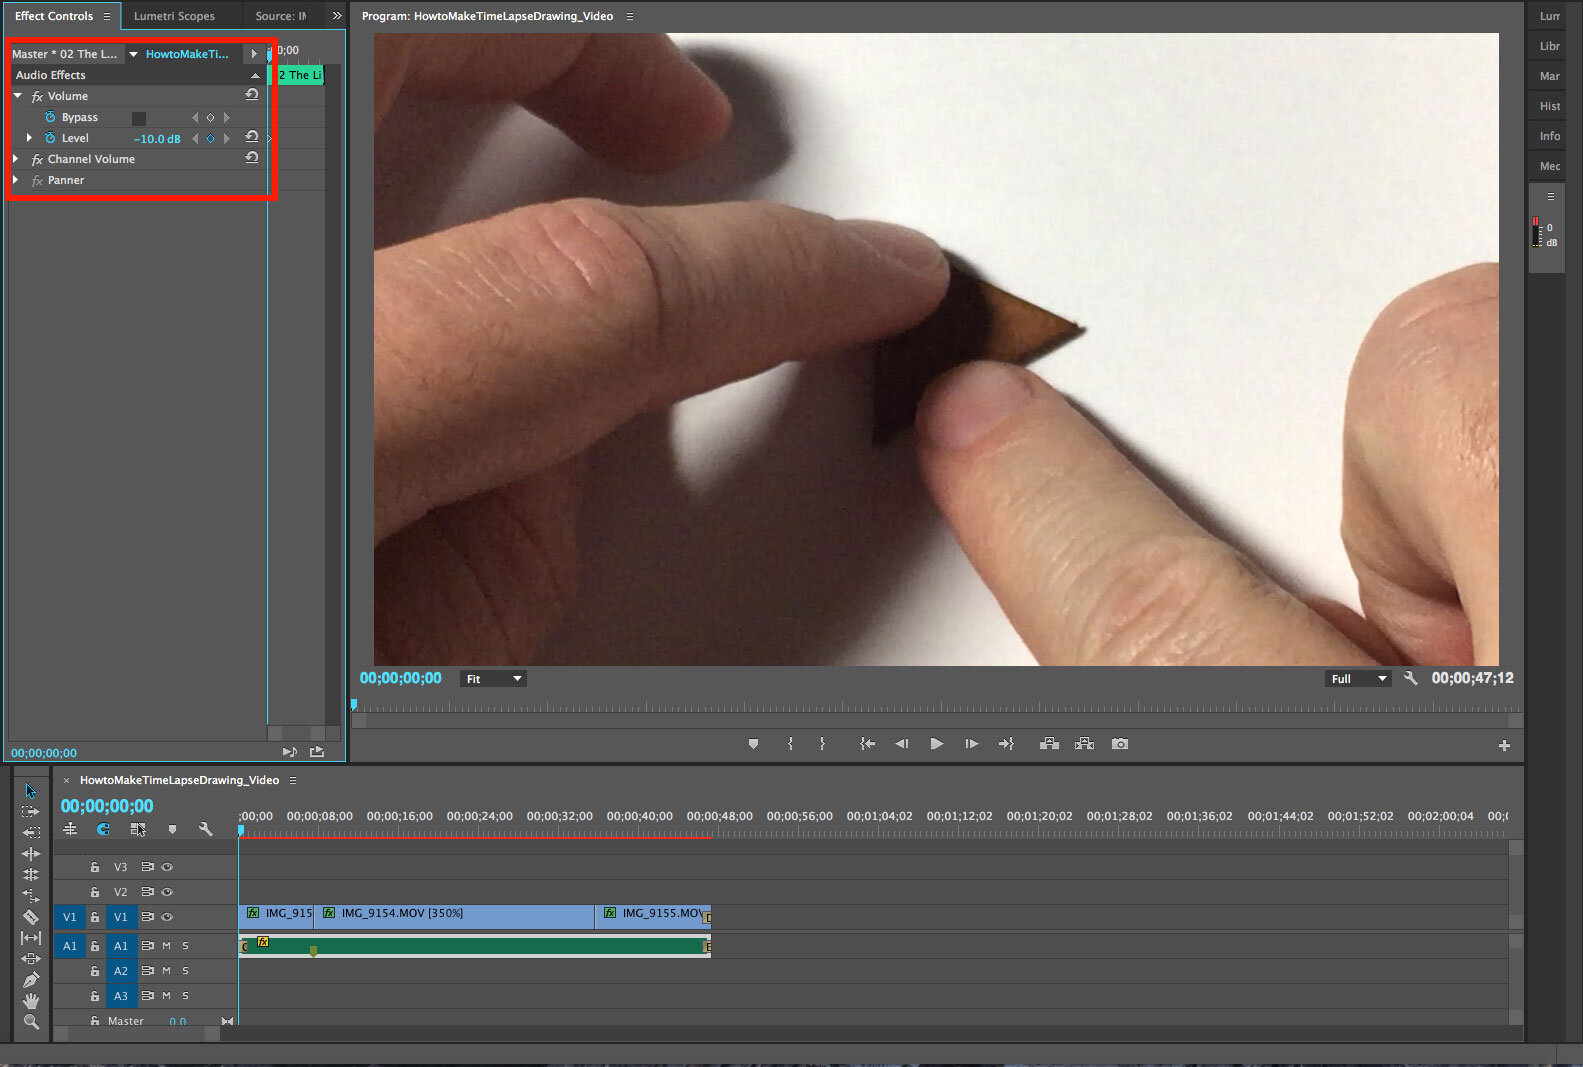
- Hit Enter / Return to render out the file.
Note: Make sure you render your entire file before exporting!
Exporting File
- Once clip is rendered, we need to export it by going to File > Export > Media or (Cmmd + M)
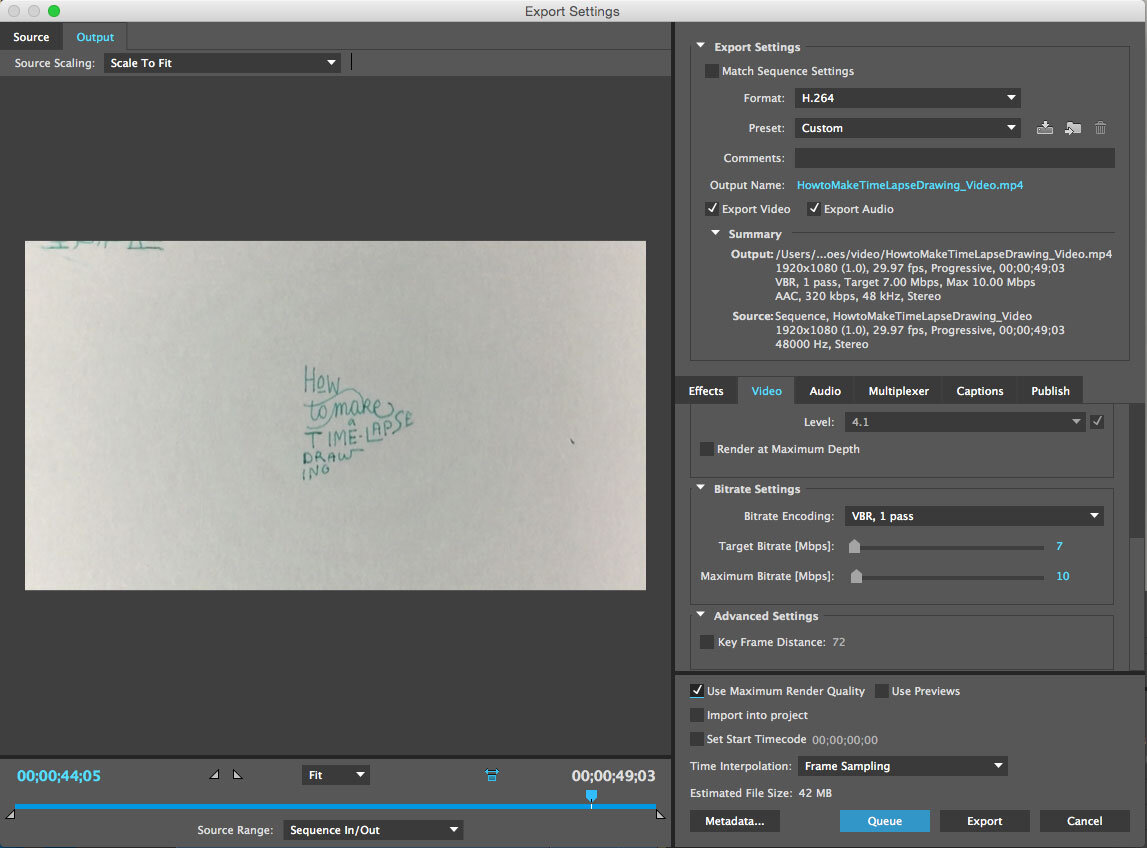
- First, make sure you’ve named your file in the Output Name area and the destination it’s supposed to go.
- Make sure format is H.264.
- We are going to go a bit custom here and start by going under Preset I select “Match Source - High bitrate”
- Go down and click the Video tab, scroll to the bottom and decrease Target Bitrate to 7 and Max Bitrate to 10
- Check “Use Max Render Quality” at the bottom
- Before you export, let’s save this Preset by clicking the first icon next to the preset field. Give it a name and click save.
- Hit Export
YouTube
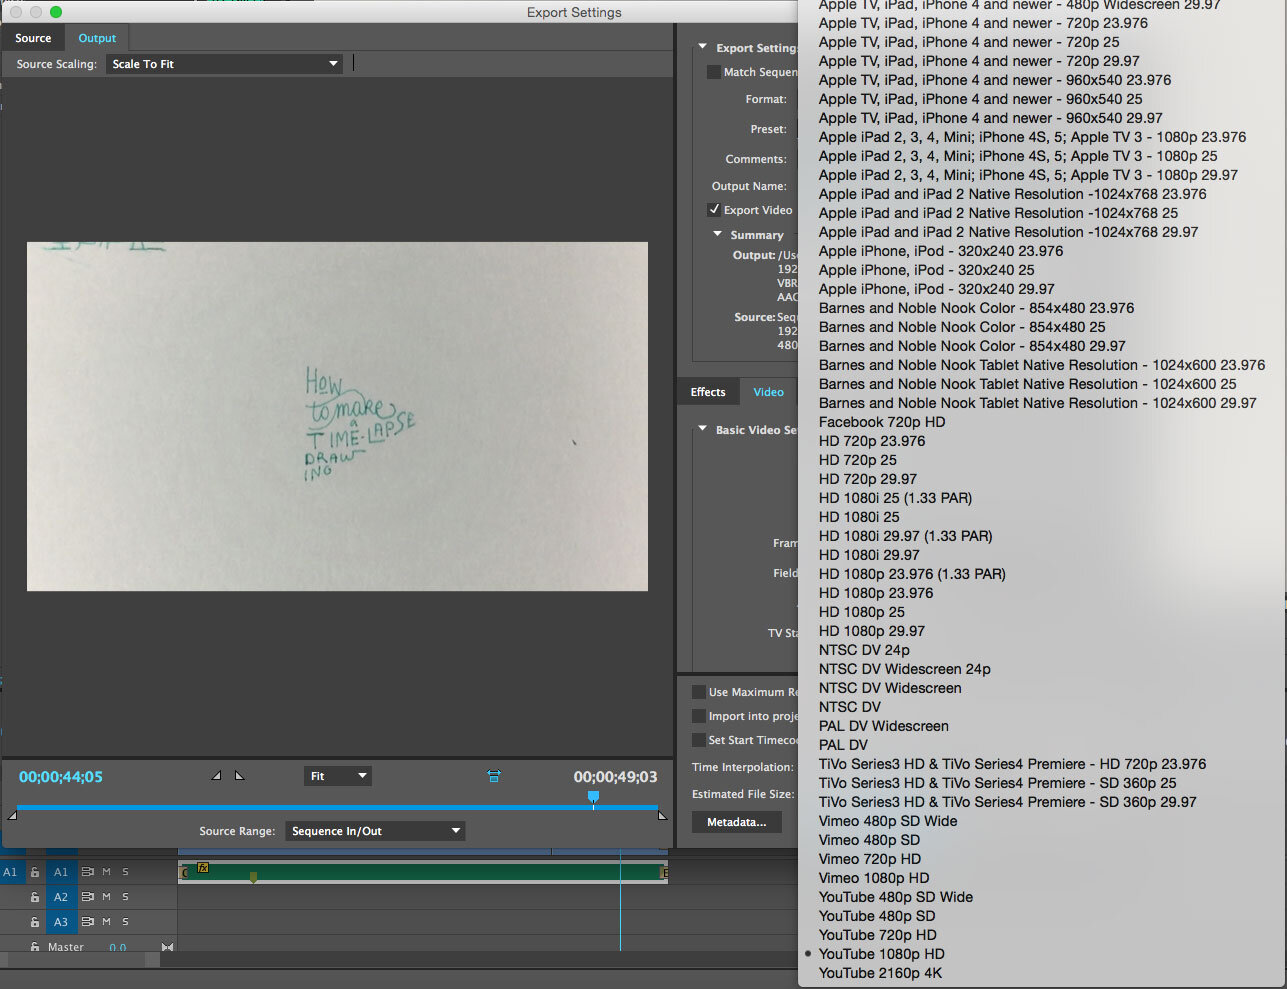
- Export media again (Cmmd+M) and this time change your Preset to YouTube 1080p HD
- Change your output name and add a _YouTube to the end of it
Final Steps
You can now take your smaller video and put it in your dropbox or airdrop it to your phone for posting.You can upload the bigger file to your YouTube channel, website or natively to Facebook.(Check out my Youtube time-lapse drawings)This was definitely a more informative post as making a time-lapse drawing is a great way to show your process, skills and engage an audience.If you found this helpful and want to learn more tips and tricks like this to build an audience and improve your creative skills, join my team and let me know what you'd like to learn or struggle within an email. I read each and every one and you'll also get a free gift.[button open_new_tab="true" color="accent-color" hover_text_color_override="#fff" size="large" url="https://perspective-collective.com/join-my-team/" text="Join My Team" color_override=""]
Key Takeaways
- Videos are in demand and bring the highest form of engagement
- Videos help you establish credibility as they showcase your process and skills
- Having a light source is crucial—overcast days and natural lighting are the best
- Always make sure you have space on your phone
- Render your entire file before exporting
